Guava Jam Cake

Who else loves Guava?!

If you are looking for a cake that is easy to make, looks impressive AND is finger-likin delicious.. look no further!!

For this cake you will need:

  • 3/4 cup guava paste (I used Goya)
  • 1 tablespoon of water
  • 3/4 cup unsalted butter, softened
  • 1 1/4 cups granulated sugar
  • 2 large eggs
  • 1 teaspoon vanilla extract
  • 2 1/4 cups flour
  • 1 1/2 teaspoon baking powder
  • 1 teaspoon salt
  • 1/2 teaspoon ground cinnamon
  • 1 1/4 cups sour cream, room temperature
  • Confectioner’s sugar for dusting

Step One  In a small microwave-safe bowl, heat guava paste and 1 tablespoon of water on high in 20 second intervals, stirring in between each, until smooth and spreadable. ( 1 to 1 1/2 minutes total). Let it cool slightly. Spoon Guava mixture into a large piping bag (If you do not have a piping bag, a large ziplock bag will work as well). Set aside.

Step Two: In the bowl of a stand mixer fitted with the paddle attachment, beat butter and granulated sugar at medium speed until fluffy, about 3 to 4 minutes. Add eggs, one at a time, beating well after each addition. Beat in vanilla; scrape sides of bowl.

Step Three: In a medium bowl, whisk together flour, baking powder, salt and cinnamon. With mixer on low speed, gradually add flour mixture to butter mixture alternately with sour cream, beginning and ending with flour mixture. Beat until combined. (Batter will be quite thick).

z3

Step Four: Spoon 2 1/4 cups (about half the batter)  into prepared pan. Using a small offset spatula, spread batter into bottom edges of pan and smooth top. Fill the remaining batter into a large piping bag. Cut a 1/2 inch opening into to tip of batter filled bag; pipe a large ring of batter along the edges of the pan. Next, cut an opening on the guava filled piping bag and pipe guava mixture inside the batter ring. spread evenly with a small offset spatula. Pipe the remaining batter on top of guava mixture. (You can cut the piping bag opening to 1 inch to make pipping easier) Smooth top with a spatula.

Step Five: Heat oven to 350º F. Bake until golden brown, about 50 to 55 minutes. You can check if it ready by inserting a wooden pick in the center and once it comes out clean, it is ready. Let it cook in pan for about 10 minutes before removing off pan. Let it cool completely on a wire rack. Dust with confectioners sugar.

I added a Glaze, this is optional.

You will need:

  •  2 tablespoons unsalted butter
  • 1 cup confectioners sugar
  • 1 tablespoon whole milk
  • 1 teaspoon cointreau (or rum)
  • 1/4 teaspoon kosher salt

In a small saucepan, heat butter over medium heat until just starting to brown, 5 to 7 minutes. Remove from heat. Add confectioners sugar, milk, salt and cointreau; whisk together until smooth. Immediately drizzle on top of cake.

z11


Enjoy!!

Garlic Bread

I am back!!!

I realized I have not posted anything in a year!! With all of this COVID-19 craziness, I thought a new recipe would be a good idea to share.

I went to my local grocery store about three weeks ago and bought a loaf of bread, I totally forgot about it until I opened my pantry and there it was, looking exactly the same it did when I bought it. Don’t get me wrong, there is nothing wrong with buying bread at the store but I started thinking of all the preservatives that the bread had to have in order for it to not go bad in 2-3 weeks. So I started doing some research on these preservatives, and what I found was not good! Some of the preservatives used in our bread also appear on things like yoga mats, explosives and petroleum products!! I read this article called “Banned bread: why does the US allow additives that Europe says are unsafe?” I have linked it if you would like to read it.

So this got me thinking, why can’t I use make my own bread? It is not hard and most of the ingredients you probably already have in your pantry. I started by making a simple loaf of bread (I will post this recipe in the following weeks) and let me tell you, I have fallen in love with bread making. There is something satisfying in knowing what is in your food that you are feeding your body and your family.

The first recipe I will share.. drum roll… Garlic Bread!! Who doesn’t love garlic bread?! I made it last week for our pasta night and it was a success!

The ingredients you will need:
– 2 tablespoons granulated sugar
– 2 1/4 teaspoon (1 packet) active dry yeast
– 1/2 cup of water
– 1/2 whole milk
– 2 1/2 cups of all purpose flour
– 1 teaspoon salt
– 1 tablespoon olive oil
– 1/2 cup (1 stick) unsalted butter, softened
– 3 tablespoons of chopped fresh parsley
– 2 teaspoons minced garlic
– pinch of salt
– 1 cup shredded cheese
– 1/4 cup grated parmesan cheese
– Ground black pepper to taste

I know it sounds like a lot of things, but trust me you can do this!

Step 1:
In a small bowl, combine sugar and yeast. Combine the 1/2 cup of water and 1/2 cup of milk in a mug and warm it up. The liquid should be around 110 to 115 degrees, then pour warm water over sugar mixture and let it stand for 10 minutes until yeast is foamy. (Important note: make sure the warm milk/water mixture is between 110 to 115. If it is cold, the yeast will NOT activate and if it is to hot, you will kill the yeast.)

Step 2:
While the yeast is activating, in a large bowl or in the bowl of the stand mixer with dough hook attachment, mix the flour and salt until combined. Pour the yeast mixture (after the 10 minutes are over); stir with wooden spoon or on low speed with dough hook host until dough forms. Transfer dough to a well- floured surface and knead by hand for 10-15 minute, until the dough is smooth, soft, elastic and only slightly sticky. OR, knead dough in stand mixer with dough hook for 5-7 minutes on medium speed, until it is ready. Note: for both options, you can add a 1 teaspoon at a time if you need a bit more flour. Transfer the dough to a lightly greased bowl. (I get some olive oil, and drizzle it onto the bowl and with a paper towel, spread it all around the bowl). Once the dough is in the bowl, cover with plastic wrap or towel and let it rise in a warm place for 1 hour until it has doubled in size. I like to put the dough inside a cabinet next to the stove. Whatever you do, do NOT open the cabinet door or peek inside the covered bowl or you can release the warmth it needs to rise.

Step 3:
Heat oven to 400 degrees. Spray a cooking sheet and set to the side. In a small bowl, stir in softened butter, your cut parsley, garlic and a pinch of salt until well combined.

Step 4:
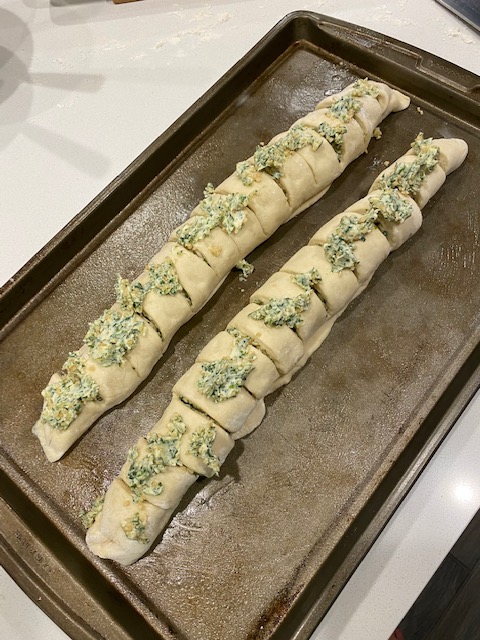
Punch down the dough and divide it into 2 pieces. Place both pieces on a lightly floured surface and let it rest for 5 minutes, covered with a clean kitchen towel. After the 5 minutes, on a floured surface, roll 1 piece of dough into a rectangle, roughly around 14×8 inch rectangle. Spread butter mixture evenly over the dough. Next, sprinkle cheese and a dash of black pepper. Roll the dough from long end into a 14 inch log. Pinch the sides to seal.

Step 5:
With log seam side-down, carefully slice dough almost completely through into a 1-inch rolls. Make sure they are still connected at the bottom. Lift dough. carefully and transfer it to your prepared cookie sheet. Rewear until you have both logs.

Step 6:
Spread the remaining butter mixture over the top of the rolls. Cover the pan and let the dough rest for 15 to 20 minutes.

IMG_0439

Step 7: Bake bread for 20- 25 minutes until deep golden brown.


Enjoy!!

Christmas time!!

It is almost Christmas time!! Is anyone else as excited as I am? I love Christmas!! I don’t know if it’s the family, the food, the lights and present but it’s my favorite time of year.

Next week I will be sharing a Christmas cookie recipe! It will have you making cookies like a pro. See you soon!!

Pumpkin Sweet Bread

Halloween is right around the corner and Thanksgiving is creeping up on us! You know what that means… holiday parties and get-togethers. Sometimes the worst part is not know what to take with you to share. I made these little pumpkin sweet breads and they are a hit and super easy to make.

P3

You will need:

  • 1 envelope of active yeast
  • ½ cup of whole milk, scalded* and cooled to 110 degrees
  • ¾ cup of brown sugar
  • 1 tablespoon of granulated sugar
  • 4 tablespoons of butter, softened
  • 2 teaspoons of pumpkin pie spice
  • 2 eggs
  • 1 cup pumpkin puree
  • 4 cups all-purpose flour
  • 8 ounces of cream cheese, cut into slices

Steps:

In a small bowl, place yeast, scalded milk and granulated sugar. Allow the yeast to bloom for about 10 minutes until frothy.

After the yeast mix is frothy, you will add the brown sugar, butter, spices, eggs, pumpkin puree and flour. Mix until well combined; knead dough for about 8 to 10 minutes until smooth and soft.

Place the dough in a greased bowl or plate, cover it with linen and allow the dough to rest for about an hour, or until it has doubled in size.Divide the dough into 16 pieces.

Fill each dough ball with a cube of cream cheese. Wrap each dough ball with kitchen twine, wrapping the twine around the dough ball to create a pumpkin shape. Make sure not to wrap the dough to tight, as it will become larger when baked. Let them pumpkin dough rest for about an hour before baking.


Preheat oven to 350 degrees. Bake the pumpkins for 20-25 minutes. Remove from the oven when baked through and are golden brown. Allow the rolls to cool for a few minutes, then remove the twine and place a pecan or almond as the stem for each pumpkin. Enjoy!

Broccoli Stuffed Chicken Breast

Lately I have been cooking some yummy foods and I just need to share them.

I love cooking, but only if I am sharing it with someone. Last week my husband was out of-town and realized that I did not cook once for myself. (I went to my mom’s to eat) So if I love cooking and sharing what I make, I need to share the recipes so you can try them and share them with your loved ones.

A couple of weeks ago I made these stuffed chicken breast filled with a broccoli and cheese mixture. It delish!

Ingredients:

  • 3-4 large chicken breasts
  • Salt & Pepper
  • 1 ½ tsp garlic powder
  • ¼ tsp paprika
  • 1 cup of chopped broccoli
  • ½ cup of peas and carrots
  • 1-cup mozzarella cheese
  • 1 tbsp of mayo
  • 2 tbsp olive oil

Instructions:

Preheat oven to 425 degrees F.

Season both sides of the chicken breast with salt, pepper, paprika, and garlic powder. Use a sharp knife to cut a slice through the middle of the chicken breast, just enough to make a pocket for the filling. Once you have your pocket opened, I add more garlic powder to the inside; you can never go wrong with garlic.

For the filling, place the chopped broccoli in a microwavable dish and add about 2-3 tablespoons of water. Cover and microwave for about 1 minute. Drain any excess water. Then add the ½ cup of frozen peas and carrots, mayo, cheese and salt and pepper. Mix until combined, and then stuff the chicken breasts. You can use a toothpick to secure the stuffing if necessary.

Heat a large skillet over medium heat and add olive oil. Sear the chicken for about 3-4 minutes on each side. Then transfer the chicken breast to an oven safe baking dish or you may place your skillet in the oven if its oven safe. You will bake the chicken for about 15-20 minutes, or until the chicken is 165 degrees.

To finish off the dish I accompanied the chicken with some cauliflower rice. If you try it, let me know your thoughts on it. Hope you enjoy.


Mexican Flan

Oooh weee its hot outside.

If you live in Texas, you know this summer is going to be killer.  With the hot summer days sometimes, you need a cool yummy snack. Who has heard of flan? It’s not custard, it is not jello but maybe a combination of both?  All I know is that it is heavenly and once you make it you will fall in love with the flavors.

jello7

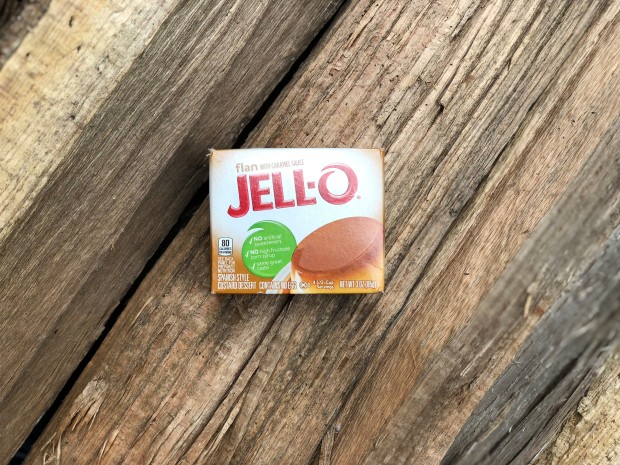
I know there are many recipes on how to make it from scratch but if you don’t have time for all of that then just do it my favorite way; using an instant flan. I love using Jell-O brand Flan, in my opinion this is the best as it will not be too sweet but just right.

jello1

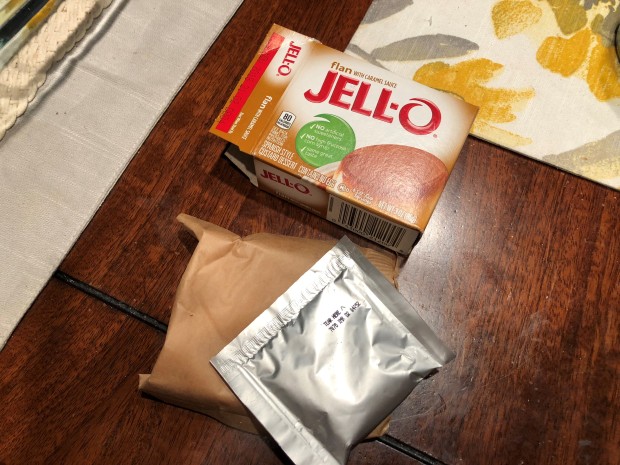
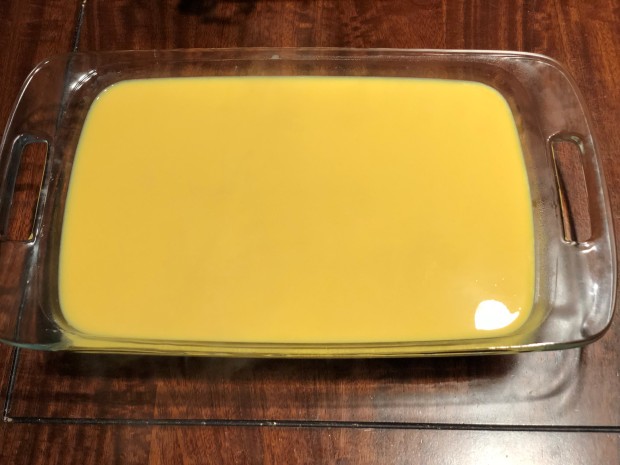
I used 4 packs of flan as I was making a large portion to share with my family. For each package you need 2 cups of milk, I personally use whole milk as I feel like it makes the flan taste richer. Place the milk in a pan and bring to a boil.  Once the milk is starting to boil, turn the stove off and stir in the packages of flan, the milk will turn a soft yellow.

Now in your container glass container (you can use any container that holds hot liquids) squeeze all 4 small packages of caramel. Then add the hot milk that is now yellow into the glass container. I would suggest you waiting for the milk to cool off for a bit before placing in the fridge. Let it sit in the fridge for at least two hours, then you’re ready to dig in.

jello3jello2jello5jello4jello6

I promise this will be your go-to dessert.

P.S. you can also do individual glass containers if you want to get fancy and impress any guests you might have.

Tuna patty Burgers

Have you had one of those days that you truly don’t feel like cooking? Or maybe you have been running around all day at work and are just tired, and the last thing you’re thinking about is making dinner. Basically it comes down to the simple fact that life is busy. Sometimes we all just need a quick, easy, inexpensive, delicious recipe.

I thought I would share with you a quick, flavorful tuna patty recipe that will make you not feel guilty for having a “burger” with these patties. We had them last night and my husband loved them. Don’t be frightened by the sound of a tuna patty burger, yes it will not taste like beef but with all the flavors your taste buds will be so confused but happy and it won’t be very fishy at all!!!

For this recipe, you will need the following ingredients:

  • 2 cans of tuna in water (I used Albacore white tuna from krogers)
  • 1 large egg
  • 1/3 cup of Panko seasoned bread crumbs
  • 1 tablespoon of mayo
  • Lemon juice (half of a large lemon)
  • 1 serrano pepper, finely chopped
  • 1 small onion, finely chopped
  • 1 tomato, chopped
  • Cilantro, chopped (about 2-3 stems)
  • 1 teaspoon salt
  • ½ teaspoon of black pepper
  • ½ teaspoon of powder garlic

Now for the fun part….

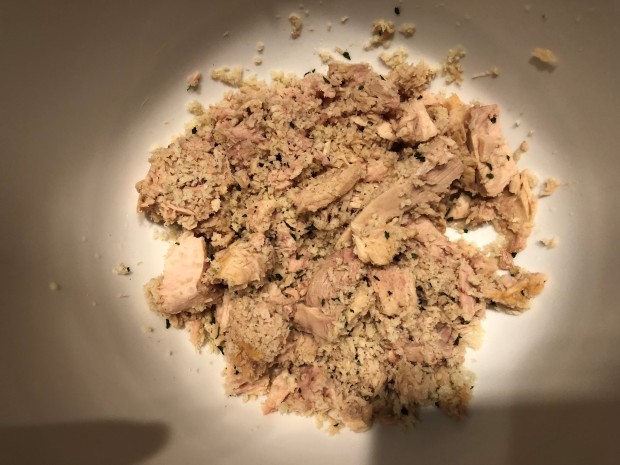
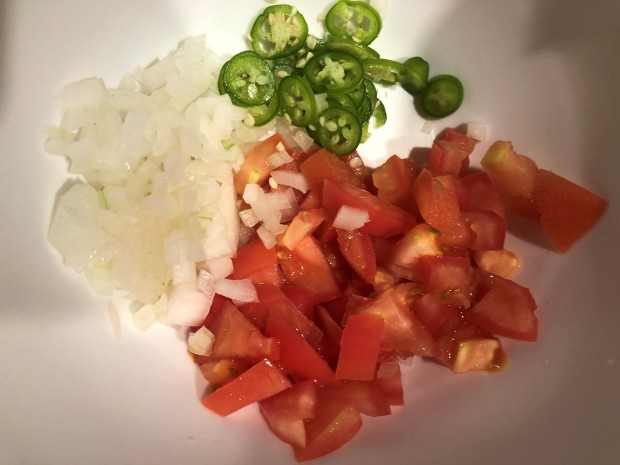
  1. Open the can of tuna and drain the water out, then place the tuna in a bowl. In this same bowl you will add the chopped onion, tomato, cilantro, and pepper and set aside.

tuna 1tuna 2tuna 3

  1. In another mixing bowl whisk together the mayo, salt, pepper, garlic, black pepper, lemon juice and eggs.
  2. Now combine both bowls into one, and with a fork mix all the ingredients together until they hold together.
  1. Once the mixture is all mixed it’s time to make the patties! I went ahead and used the top of the breadcrumb container to get a perfect circle. Place the tuna mix into the lid and start compressing the mixture together, once you are satisfied with the thickness of the patty remove from the lid and place them aside.

tuna 5

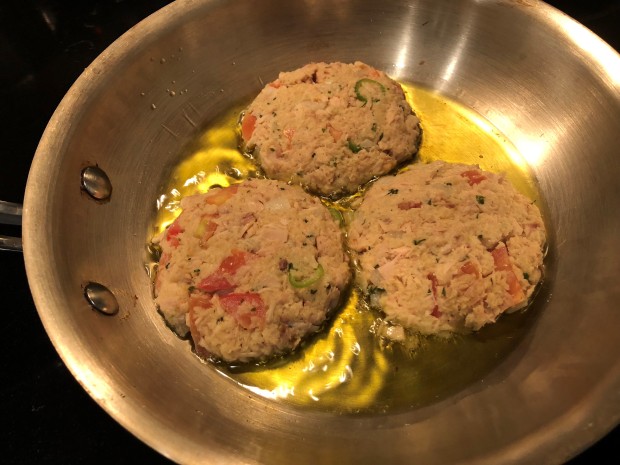
  1. In a large nonstick pan, add some olive oil as you will cook each patty for about three minutes on each side until golden brown and semi crispy on the outside. You might need to add more oil in between batches of patties to make sure they all cook.

tuna 6tuna 7tuna 8

With the two cans of tuna I was able to make 5 tuna patties! I went ahead and added some swiss cheese on top of my patties and let it melt to resemble a cheeseburger. The outcome was fabulous! Let me know once you tried this how they came out and if you enjoyed them as much as we did.

Texas Safari

Do you want to go to a Safari without leaving Texas? This past weekend my husband and I took off on a small adventure to Natural Bridge Wildlife Ranch. It is an African Safari, Texas Style. Just on the outskirts of San Antonio you will find over 450-acres of natural, scenic, protected environment where animal roam around and come to your car so you can feed them. You pay $22.00 per adult and $13.50 per child and are given one baggie of food for the animals; you can buy extra baggies of food for $2.50 (We bought two because I wanted to make sure I could feed as many animals I could).

As you enter the gates, there are animals all around. The animals are used to vehicles so they are not startled but you do have to go no more than 5 mph.   There is Deer, Texas Longhorns, Rhinos, Lemurs, Zebras, Camels, Kangaroos, Giraffes, and Ostriches. Most of them will come to your window to be fed, it it’s really amazing. If you are bold enough you can even feed them from your hand. I tried this but realized I was semi screaming when the animals would get close. If you have kids this is somewhere you should visit, and if you don’t have kids then you should still come because its all-around fun.

safari1safari2safari 3safari 5safari 4

Something I should mention is that dogs are not allowed in the park; they might bark and scare the animals so leave them at home. Also, once you circle around you can go into the park to feed the animals again, there is not a restriction on how many times you can go. If you are interested here is their link: www.wildliferanchtexas.com


Side note, if you do happen to visit the ranch, I would suggest you stop by at Sal-o-Mon’s (18780 N Interstate 35 Frontage Rd, Schertz, TX 78154)  for a bite to eat before getting to the ranch. The food is amazing! It is a small family owned business, from the outside it can look a bit odd and you might be skeptical of stopping to eat, but don’t be. The menu does not have that many choices but whatever you get you will not be disappointed. My husband ordered the chilaquiles rojos and they were bomdiggity. They tortilla strips were crispy and spicy, you could taste all the flavors in each bite. I ordered jamon con huevo (ham and eggs) and they were well seasoned. Did I forget to mention that the tortillas are all handmade!!! We ordered some tacos al pastor and asada and the pastor ones are delicious. Go try them, you won’t regret it.

Sal-o-mon6sal-o-mon5sal-o-mon4